
The following article provides information, hints and tips on how to record acoustic guitar. It covers microphone types, mic placement, effects, eq, mixing tips and more, giving you everything you need to create professional-sounding acoustic guitar recordings.
Let's get started...
How To Record Acoustic Guitars: Microphone Choice

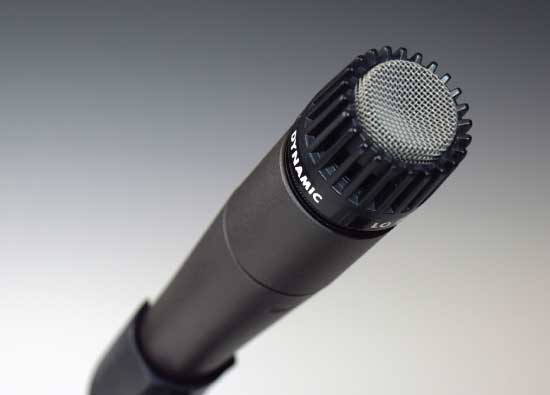
When recording an acoustic guitar it's best to use condenser microphones as typically they are more sonically sensitive and have a flatter frequency response than dynamic microphones. This means that they will pick up all the tonal quality of the guitar and reproduce it accurately.
This is not to say that dynamic microphones are not useful within recording. However, due to their electronics and frequency response, they are typically better used for louder sounds / instruments such as drums, percussion, certain amplifiers etc.
A condenser microphone will need to be powered via phantom power (a small electrical charge that is sent to the microphone) this can be sent from most audio interfaces / mixing desks. However some microphones will allow you to place a battery within them to provide this power. This is worth checking before purchase
There are many condenser microphones for the home studio budget. Be prepared to spend around $200 to $400 for a microphone. There are many good quality products at this price range that will not break the bank. Ideally, you will need to purchase two to get a realistic recording of your guitar. You may want an optional third microphone to capture the room ambience but this is a matter of taste and budget.
In general, large diaphragm microphones are great for capturing the sound of the guitar body (some examples include AKG C3000, C214, Rode NT1 or NT2), small diaphragm microphones are good for recording the guitar strings (some examples include AKG C1000, Rode NT3) and a stereo pair of microphones can be used for an ambient recording (Rode NT5).
Without doubt, the best thing is to try different mic's before you buy. Have you got a friend with a decent setup? Of course, this isn't always possible: the next best thing is to play around with them at your local music store. You'll also get some great advice from a good retailer.
Microphone Placement

They are many different placements when recording an acoustic guitar: it's not an exact science. Each guitar has tonal ‘sweetspots’ and resonate in different ways.
One of the most common ways of recording an acoustic is to record the body and the fretboard. This provides the depth of the and the high end sparkle of the strings.
Place the large diaphragm microphone about 6 inches away from the guitar and just behind the bridge as a starting place. Arm your recording track, play your guitar and listen to the recording through some headphones. Either have someone else move the microphone or move the guitar around the area behind the bridge to hear the best capture.
You may also want to change the distance between the guitar and the microphone depending on your set up and sensitivity of the microphone you are using. Place the small diaphragm microphone above the 12th fret about 6 inches away and repeat the process just used with the body microphone. Do this in isolation from the body microphone and then add the two together to review how they sound in conjunction.
Acoustic Image
You can add ambience miking however, there are somethings to consider first. On one hand this will giving the recording the “audience” perspective however it will also capture the room’s ambience. Depending on the room this may or may not be desirable, it could provide some lovely open space to the recording or capture unwanted frequencies that will need to equalized out in the mixing stage. It may also make adding reverb to the mix more complicated as you will have some natural reverb in the mix already. This is a judgement call and if in doubt use the body / neck method only to start with. If you do want to use this method however, place a stereo pair of microphones in front of the guitar and depending on space 4 to 12 feet in front.
One common spacing for a stereo pair of microphones is called XY coincident pairing, that is they are placed with the microphone heads pointing towards each other but at right angles so that one points to the right and the other points to the left.
Getting Ready To Record
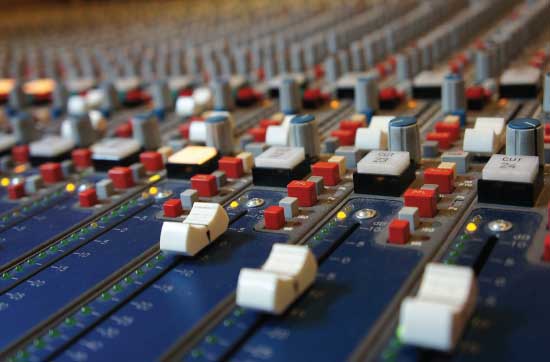
You will now be at the stage where each microphone will be connected to a separate track armed for recording. Keep the individual track volumes at 0dB and adjust any input gain using your mixing desk or audio interface. Ideally to get a natural capture of the guitar you want if possible not to compress any of the microphone signals that are coming into the mixing desk or digital audio workstation (DAW).
Compression is great for high input instruments such as guitar amps, drums etc but can change the nature of the recording. However, if you do need to use compression due to some high peaking (most likely on the body microphone when guitar strumming) then it is best to be sparing.
The microphone choice, capture and signal quality is one of the most important stages of the recording as a good capture will require very little mixing and ‘tweeking’.
Recording Process
This is very dependent on the DAW you are using so will not go into this too much. If your recording is part of a large band recording then a click track is essential. All DAW’s will have something that is built in. If you have not recorded against a click track, have a few practice runs, the tendency with all of us guitarists is to play a little in front of the click as we get into the music.
How To Stop String Squeak
The recording may also pick up string squeaks when changing chords and positions on the guitar. You can reduce this a number of ways, check your technique, is the way you move between chords / positions minimizing string contact, keep your strings clean through wiping them down or change them if they are old, try a string lubricant, some guitarists even lubricate there fingers a little. There are many ways to reduce squeaking: see what works for you.
How To EQ An Acoustic Guitar

When equalizing the recording the best approach is to be sparing, typically you will want to cut particular frequencies rather than boost / add them to keep the originality of the sound. Equalizing will also depend on what other instruments are going to be in the mix, however, you will find that you want to cut out any resonance.
Guitar resonance is typically an unwanted booming sound and typically sits within between 200-300Hz. This can be cut out using a parametric EQ found on most DAWs. Using a the EQ, create a short Q (so you only affect the frequency you are looking for), push the gain up to the maximum volume and sweep for the resonant frequency, when found cut back the volume. This is called EQ of filter sweeping.
If you are recording the guitar with only a few other instruments (e.g. another guitars and vocals), then you can leave the ‘EQing’ there and keep the complete tonal spectrum of the guitar. However, if you adding many other instruments that will compete for frequency space (e.g. other guitars, keyboards, synths etc.) you may want to cut out other frequencies. A good example of this is where you have recorded a strumming guitar part mixed in with other guitar parts. As this recording is primarily there for the rhythm, you can isolate this rhythmic element by cutting out the low and middle frequencies. On its own it will not sound attractive but when added to the other parts you will get a sense of the acoustic guitar rhythm without a frequency overload from all the recording tracks.
Panning and Acoustic Guitar Effects
You will want to keep each microphone track that you used to capture the recorded panned to the same place. This will keep the tonal quality of the instrument in the same place on the recording. There are exceptions to the rule with some more complex mixes, however, in the first instance best to keep the panning simple and place the guitar in its own space usually either left or right of centre.
If you want to keep the recording natural, the best effect is to add just a little reverb to the guitar track. Ideally, do this by creating an auxiliary track and add a reverb to that track. Create a link between the recorded guitar track and the auxiliary reverb track via a bus.
By doing this you can add the same reverb to all tracks making the song sound like it is recorded in the space even if it hasn’t been. Increase the volume of the bussed reverb until you start to hear the reverb and then take it off a little. Ideally you want the sense of reverb there but not too much so it doesn’t dominate the song unless you are looking for that effect.
How To Record Acoustic Guitar: 10 Top Tips
Here is a summary of some important recording tips covered in the article:
• Use condenser microphones (one large diaphragm and one small diaphragm microphone).
• Start by ‘miking’ the body and the fretboard of the guitar.
• Listen for the tonal guitar ‘sweetspots’ before recording.
• Practice playing against a click track if not tried this before.
• Reduce string squeaking by assessing your technique, cleaning strings, replacing strings or by using a string lubricant.
• Review your use of compression. If your playing style does not warrant it try not to use it to get a natural sound. If strumming then use sparingly to prevent high input peaks.
• Check and cut recorded resonance. Listen for any booming sound, then run an EQ sweep to isolate and cut the unwanted sound.
• If you have many other instruments recorded with your guitar track review whether you need all the frequency of the guitar there, can you cut some of the frequencies that are competing with the other recorded tracks.
• Pan the guitar recording (including all miked tracks) to either the right or left so its within its own space.
• Add a touch of reverb via an auxiliary to provide a touch of ambience to the recording.
We hope that his guide helps you to get a professional sounding acoustic guitar recording. subscribe to Guitar Command for more guitar tips, lessons and news.
